This tutorial will go over how to set up a custom domain name from Porkbun for a server on Netlify. I will be using Porkbun’s DNS in my example instead of Netlify’s. This tutorial assumes you have already purchased and registered a domain name on Porkbun.
What You Need
- A registered domain name on Porkbun
- A Netlify account
Resources
Documentation
- Netlify Documentation on Domain Delegation
- Netlify Documentation – Configuring External DNS
- Porkbun Documentation on How to Change Your Namespaces
Additional Resources
- IsItUp.org – If encountering HTTP issues while working through this guide, check if the website is down.
- netlifystatus.com – Use to check the status of Netlify.
Steps
1. Add Domain Alias to Your Site on Netlify
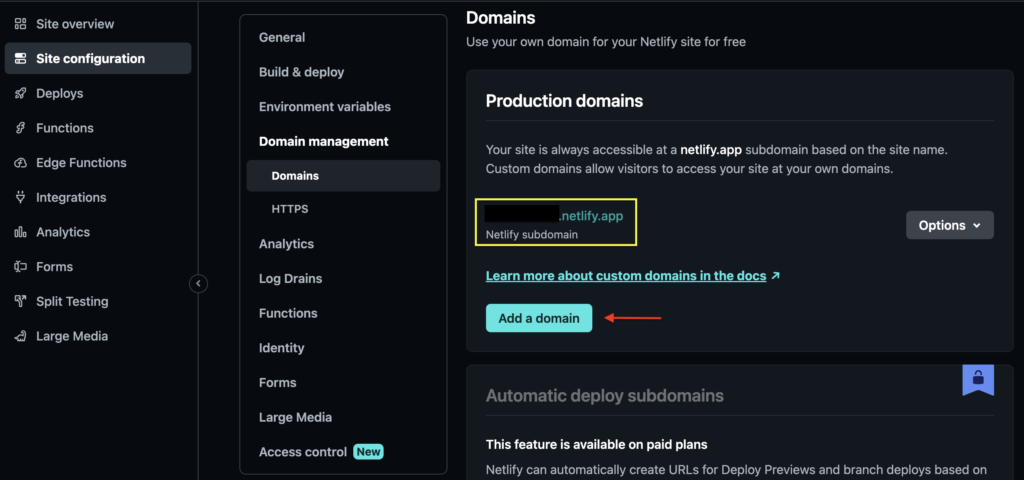
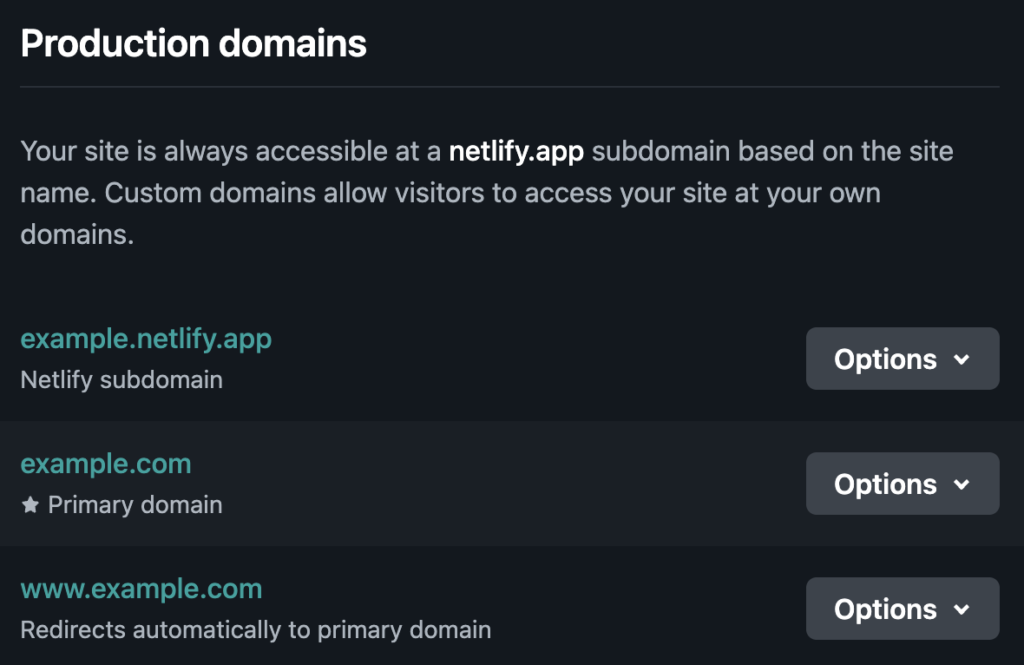
Go to your site’s Netlify page and click on Site Configuration on the sidebar. Click on Domain Management. Take note of your site’s Netlify subdomain name as you will need it later. Under Production domains, click on “Add a domain” and enter your custom domain name.
2. Edit Your DNS Records on Porkbun
On Porkbun, go to Account > Domain Management. Scroll down to your domain name. Click on the DNS link below your domain name to manage your DNS records. Another way to access your DNS records is to hit the “Details” tab and click on “Edit” under “DNS Records”.

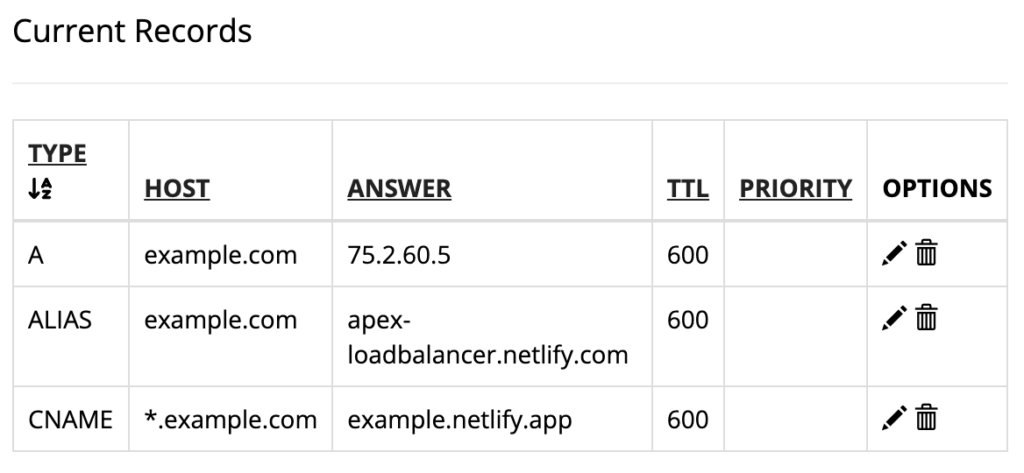
You will want to add three records here – a CNAME, an ALIAS, and an A type. We will be using default values except for the indicated attributes for each record. 2024 Update: I was informed that Porkbun doesn’t allow us to set an A type record after setting the CNAME and ALIAS, so you may not need to set the A record type!
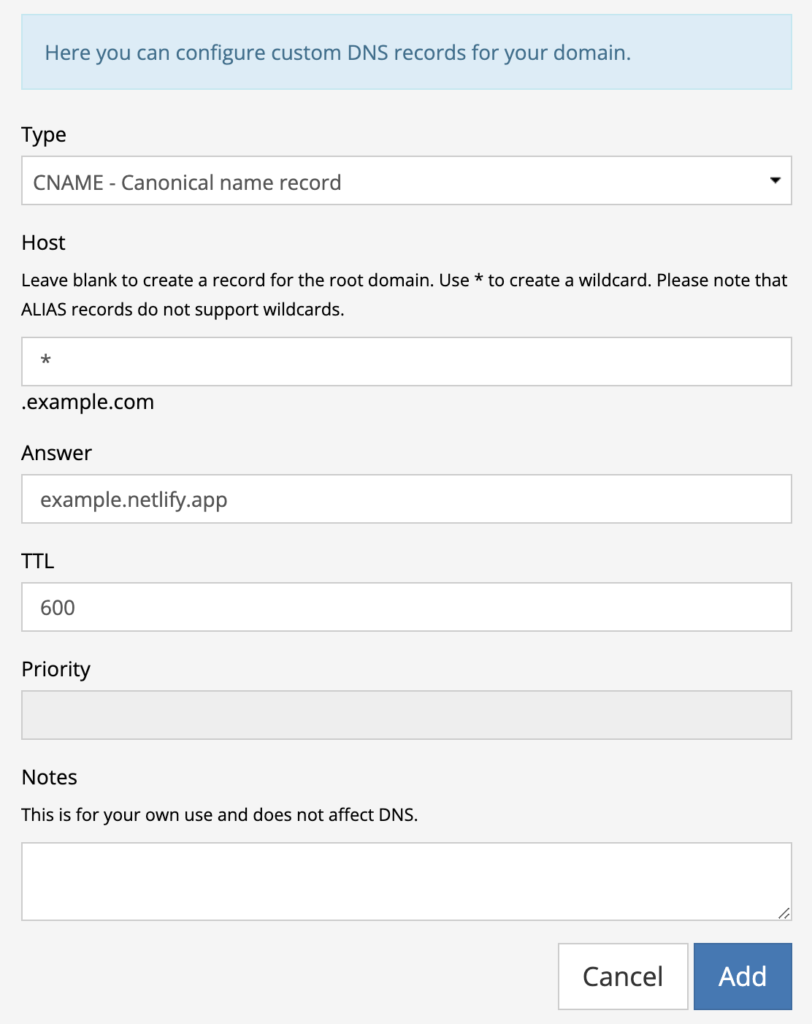
1. CNAME Record
- Type: CNAME – Canonical name record
- Host: *
- Answer: [your Netlify subdomain]
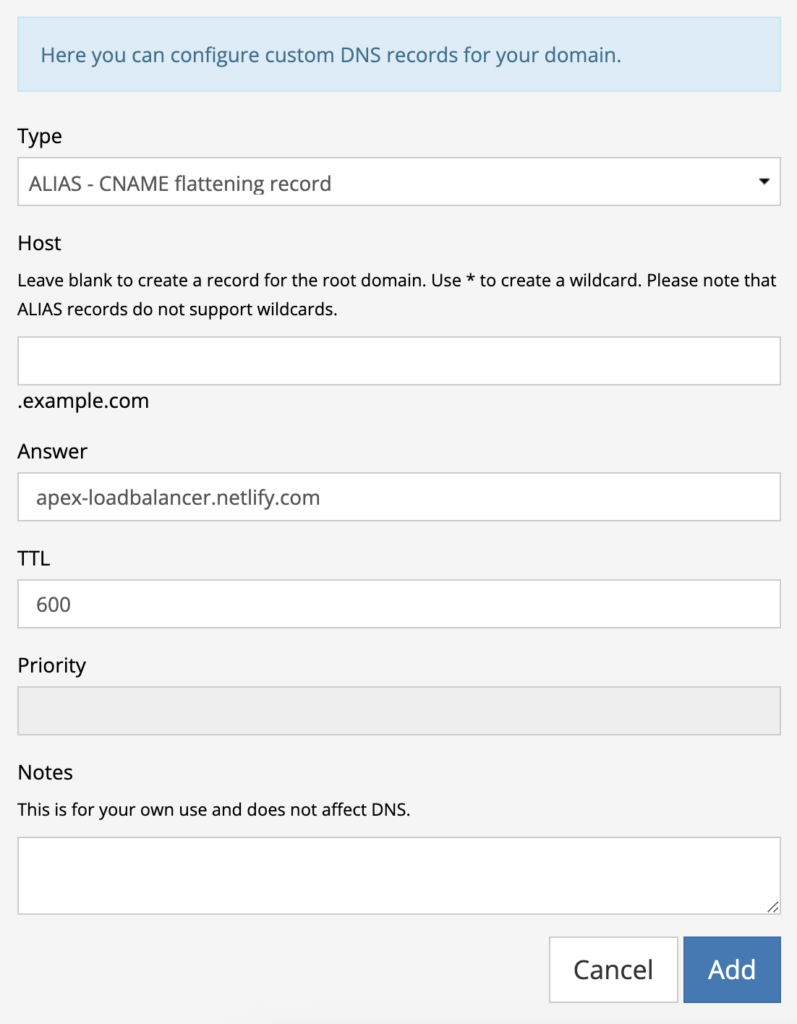
2. ALIAS Record
- Type: ALIAS – CNAME flattening record
- Answer: apex-loadbalancer.netlify.com
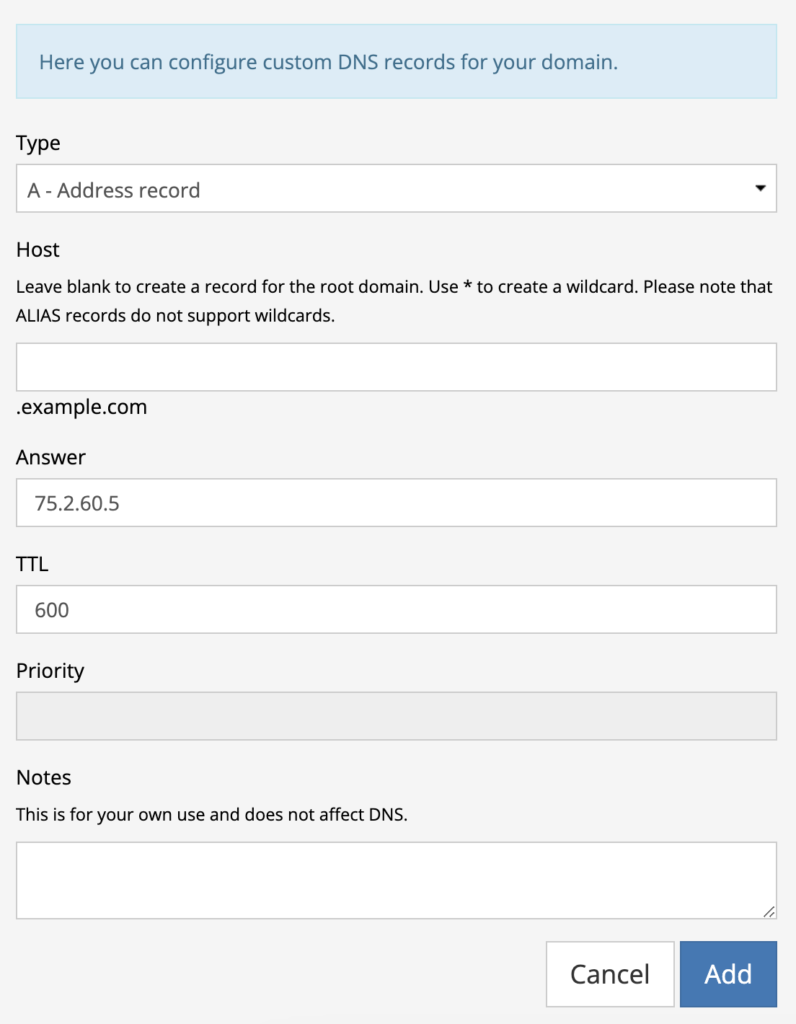
3. A (Address) Record
- Type: A – Address record
- Answer: 75.2.60.5
Current Records
After adding your records, you can scroll down to check the current records. Your records should look similar to the image below.
It may take 48 hours for your domain names to propagate, so the next step will be just to wait until that happens.
3. Check Back on Netlify
Go back to your Domain Management in under Site Configuration in Netlify for your website and check your production domains.
If it says “Awaiting External DNS” by your domain name, you may have to wait a little longer for your new settings to finish propagating or there may have been a mistake during the setup process.
If your domain names show no errors, the setup was a success! You may set your primary domain by clicking on “Options” if needed. You will now be able to access your site through your custom domain name.
8 Comments
Thank you for making this so easy to understand and follow! Your blog helped me set up my domain.
I’m really glad to hear that! I actually had no idea people are reading my blog posts haha, so it’s awesome to know it helped! Thank you for taking the time to read and comment 🙂
Thank you very much for your guide! It was super helpful!
You’re very welcome! Glad to hear it helped! 🙂
Interesting you were able to set the three of them, porkbun doesn’t allow an A (Address) Record after setting the other twos. And Netlify’s documentation points that one as a fallback if the other two can’t be set. So I think it can be avoided.
Oh interesting! I wonder if there was an update on porkbun’s end since the time of this post? That’s good to know. Thank you for the input!
thank you for this awesome tutorial <3 happy new year!
You’re welcome, and thank you for visiting! Happy new year! 🙂